<?xml version="1.0" encoding="utf-8"?><feed xmlns="http://www.w3.org/2005/Atom" ><generator uri="https://jekyllrb.com/" version="3.10.0">Jekyll</generator><link href="https://ajay3007.github.io/feed.xml" rel="self" type="application/atom+xml" /><link href="https://ajay3007.github.io/" rel="alternate" type="text/html" /><updated>2026-05-05T11:48:33+00:00</updated><id>https://ajay3007.github.io/feed.xml</id><title type="html">ajdevhub</title><subtitle>Projects and Learning Resources</subtitle><author><name>Ajay Kumar Gupt</name></author><entry><title type="html">Supercharge Your Static Site: Adding a Free, Real-Time CMS to GitHub Pages</title><link href="https://ajay3007.github.io/blog/2026/02/24/supercharge-your-static-site-with-decap-cms/" rel="alternate" type="text/html" title="Supercharge Your Static Site: Adding a Free, Real-Time CMS to GitHub Pages" /><published>2026-02-24T18:30:00+00:00</published><updated>2026-02-24T18:30:00+00:00</updated><id>https://ajay3007.github.io/blog/2026/02/24/supercharge-your-static-site-with-decap-cms</id><content type="html" xml:base="https://ajay3007.github.io/blog/2026/02/24/supercharge-your-static-site-with-decap-cms/"><![CDATA[<p>There is an undeniable beauty to static site generators like Jekyll, Hugo, and Next.js. They are incredibly fast, ridiculously secure, and can be hosted for completely free on GitHub Pages.</p>

<p>However, they all share one incredibly frustrating bottleneck: <strong>The Publishing Experience.</strong></p>

<p>If you want to write a new blog post or add a new project to your portfolio, you typically have to open your IDE, create a new Markdown file, manually type out the YAML Front Matter exactly right, write your post in raw text, commit the file, and <code class="language-plaintext highlighter-rouge">git push</code> it to your repository. It is a tedious workflow, especially when you just want to fix a typo from your phone.</p>

<p>But what if you could have the speed and security of a Static GitHub Pages site, combined with the beautiful, rich-text dashboard of WordPress?</p>

<p>Enter <strong>Decap CMS</strong> (formerly Netlify CMS).</p>

<p>In this post, I am going to walk you through exactly how I added a completely free, database-less, real-time Content Management System to this very portfolio.</p>

<h2 id="architecture-how-it-works">Architecture: How it Works</h2>

<p>Because a GitHub Pages site is purely static HTML/CSS, you cannot run a traditional backend database. So, where does the CMS live?</p>

<p>Decap CMS is a “Headless CMS”. It is literally just a single HTML file and a Javascript bundle (<code class="language-plaintext highlighter-rouge">admin/index.html</code>) that lives in your repository. When you navigate to <code class="language-plaintext highlighter-rouge">/admin</code>, the React application boots up in your browser.</p>

<p>When you write a post and hit “Publish”, the CMS uses the GitHub API to literally write the Markdown file and commit it sequentially to your repository on your behalf. GitHub Pages detects the new commit, rebuilds your site automatically, and your blog is live in seconds.</p>

<h2 id="step-1-bridge-the-authentication-the-secret-sauce">Step 1: Bridge the Authentication (The Secret Sauce)</h2>

<p>To allow the CMS to safely commit files to your GitHub repository without forcing you to memorize OAuth tokens, you need an Identity broker. The absolute easiest way to do this is to link your GitHub repository to <strong>Netlify</strong>.</p>

<blockquote>
  <p>[!NOTE] 
Your code still permanently lives on GitHub. Netlify is simply acting as the fast CDN host and the authentication broker.</p>
</blockquote>

<ol>
  <li>Go to <a href="https://app.netlify.com/">Netlify</a> and create a free account.</li>
  <li>Click <strong>Add new site -&gt; Import an existing project -&gt; Deploy with GitHub</strong>.</li>
  <li>Select your Jekyll/Hugo repository and hit <strong>Deploy</strong>.</li>
</ol>

<h2 id="step-2-enable-git-gateway">Step 2: Enable Git Gateway</h2>

<p>Once your site is live on Netlify, we need to explicitly give it permission to edit your GitHub repository.</p>

<ol>
  <li>In your Netlify dashboard, go to <strong>Site settings &gt; Identity</strong> (on the left menu).</li>
  <li>Click the massive <strong>Enable Identity</strong> button.</li>
  <li>Scroll further down that same page to <strong>Services &gt; Git Gateway</strong>.</li>
  <li>Click <strong>Enable Git Gateway</strong>.</li>
</ol>

<p>This securely binds your Netlify Auth infrastructure directly to your GitHub repository structure.</p>

<h2 id="step-3-scaffold-the-cms-application">Step 3: Scaffold the CMS Application</h2>

<p>Now we inject the actual CMS into your repository. You only need to create two files. Create an <code class="language-plaintext highlighter-rouge">admin</code> folder at the root of your project.</p>

<h3 id="1-adminindexhtml">1. <code class="language-plaintext highlighter-rouge">admin/index.html</code></h3>
<p>This is the React application payload. It loads the CMS and the Netlify Identity login widget.</p>

<blockquote>
  <p>[!WARNING]
If you are accessing the <code class="language-plaintext highlighter-rouge">/admin</code> panel from your native <code class="language-plaintext highlighter-rouge">github.io</code> domain instead of the <code class="language-plaintext highlighter-rouge">.netlify.app</code> domain, you MUST supply your Netlify URL to the Identity widget during initialization, otherwise the login will fail due to cross-origin issues!</p>
</blockquote>

<div class="language-html highlighter-rouge"><div class="highlight"><pre class="highlight"><code><span class="cp">&lt;!doctype html&gt;</span>
<span class="nt">&lt;html&gt;</span>
<span class="nt">&lt;head&gt;</span>
    <span class="nt">&lt;meta</span> <span class="na">charset=</span><span class="s">"utf-8"</span> <span class="nt">/&gt;</span>
    <span class="nt">&lt;meta</span> <span class="na">name=</span><span class="s">"viewport"</span> <span class="na">content=</span><span class="s">"width=device-width, initial-scale=1.0"</span> <span class="nt">/&gt;</span>
    <span class="nt">&lt;title&gt;</span>My Content Manager<span class="nt">&lt;/title&gt;</span>
<span class="nt">&lt;/head&gt;</span>
<span class="nt">&lt;body&gt;</span>
    <span class="c">&lt;!-- Decap CMS Script --&gt;</span>
    <span class="nt">&lt;script </span><span class="na">src=</span><span class="s">"https://unpkg.com/decap-cms@^3.0.0/dist/decap-cms.js"</span><span class="nt">&gt;&lt;/script&gt;</span>
    
    <span class="c">&lt;!-- Netlify Identity Widget for Authentication --&gt;</span>
    <span class="nt">&lt;script </span><span class="na">src=</span><span class="s">"https://identity.netlify.com/v1/netlify-identity-widget.js"</span><span class="nt">&gt;&lt;/script&gt;</span>
    <span class="nt">&lt;script&gt;</span>
      <span class="k">if</span> <span class="p">(</span><span class="nb">window</span><span class="p">.</span><span class="nx">netlifyIdentity</span><span class="p">)</span> <span class="p">{</span>
        <span class="nb">window</span><span class="p">.</span><span class="nx">netlifyIdentity</span><span class="p">.</span><span class="nx">init</span><span class="p">({</span>
          <span class="na">APIUrl</span><span class="p">:</span> <span class="dl">"</span><span class="s2">https://[your-netlify-url].netlify.app/.netlify/identity</span><span class="dl">"</span>
        <span class="p">});</span>
        <span class="nb">window</span><span class="p">.</span><span class="nx">netlifyIdentity</span><span class="p">.</span><span class="nx">on</span><span class="p">(</span><span class="dl">"</span><span class="s2">init</span><span class="dl">"</span><span class="p">,</span> <span class="nx">user</span> <span class="o">=&gt;</span> <span class="p">{</span>
          <span class="k">if</span> <span class="p">(</span><span class="o">!</span><span class="nx">user</span><span class="p">)</span> <span class="p">{</span>
            <span class="nb">window</span><span class="p">.</span><span class="nx">netlifyIdentity</span><span class="p">.</span><span class="nx">on</span><span class="p">(</span><span class="dl">"</span><span class="s2">login</span><span class="dl">"</span><span class="p">,</span> <span class="p">()</span> <span class="o">=&gt;</span> <span class="p">{</span>
              <span class="nb">document</span><span class="p">.</span><span class="nx">location</span><span class="p">.</span><span class="nx">href</span> <span class="o">=</span> <span class="dl">"</span><span class="s2">/admin/</span><span class="dl">"</span><span class="p">;</span>
            <span class="p">});</span>
          <span class="p">}</span>
        <span class="p">});</span>
      <span class="p">}</span>
    <span class="nt">&lt;/script&gt;</span>
<span class="nt">&lt;/body&gt;</span>
<span class="nt">&lt;/html&gt;</span>
</code></pre></div></div>

<h3 id="2-adminconfigyml">2. <code class="language-plaintext highlighter-rouge">admin/config.yml</code></h3>
<p>This file is the brain of the CMS. It tells Decap exactly what folders to look at (e.g., <code class="language-plaintext highlighter-rouge">_posts</code>) and what fields to generate in the dashboard UI. Notice that we set the backend to <code class="language-plaintext highlighter-rouge">git-gateway</code>.</p>

<div class="language-yaml highlighter-rouge"><div class="highlight"><pre class="highlight"><code><span class="na">backend</span><span class="pi">:</span>
  <span class="na">name</span><span class="pi">:</span> <span class="s">git-gateway</span>
  <span class="na">branch</span><span class="pi">:</span> <span class="s">master</span> <span class="c1"># Update this to 'main' if that is your default branch</span>

<span class="na">media_folder</span><span class="pi">:</span> <span class="s2">"</span><span class="s">assets/images/posts"</span>
<span class="na">public_folder</span><span class="pi">:</span> <span class="s2">"</span><span class="s">/assets/images/posts"</span>

<span class="na">collections</span><span class="pi">:</span>
  <span class="pi">-</span> <span class="na">name</span><span class="pi">:</span> <span class="s2">"</span><span class="s">blog"</span>
    <span class="na">label</span><span class="pi">:</span> <span class="s2">"</span><span class="s">Blog</span><span class="nv"> </span><span class="s">Posts"</span>
    <span class="na">folder</span><span class="pi">:</span> <span class="s2">"</span><span class="s">_posts"</span>
    <span class="na">create</span><span class="pi">:</span> <span class="no">true</span>
    <span class="na">slug</span><span class="pi">:</span> <span class="s2">"</span><span class="s">---"</span>
    <span class="na">fields</span><span class="pi">:</span>
      <span class="pi">-</span> <span class="pi">{</span><span class="nv">label</span><span class="pi">:</span> <span class="s2">"</span><span class="s">Layout"</span><span class="pi">,</span> <span class="nv">name</span><span class="pi">:</span> <span class="s2">"</span><span class="s">layout"</span><span class="pi">,</span> <span class="nv">widget</span><span class="pi">:</span> <span class="s2">"</span><span class="s">hidden"</span><span class="pi">,</span> <span class="nv">default</span><span class="pi">:</span> <span class="s2">"</span><span class="s">post"</span><span class="pi">}</span>
      <span class="pi">-</span> <span class="pi">{</span><span class="nv">label</span><span class="pi">:</span> <span class="s2">"</span><span class="s">Title"</span><span class="pi">,</span> <span class="nv">name</span><span class="pi">:</span> <span class="s2">"</span><span class="s">title"</span><span class="pi">,</span> <span class="nv">widget</span><span class="pi">:</span> <span class="s2">"</span><span class="s">string"</span><span class="pi">}</span>
      <span class="pi">-</span> <span class="pi">{</span><span class="nv">label</span><span class="pi">:</span> <span class="s2">"</span><span class="s">Publish</span><span class="nv"> </span><span class="s">Date"</span><span class="pi">,</span> <span class="nv">name</span><span class="pi">:</span> <span class="s2">"</span><span class="s">date"</span><span class="pi">,</span> <span class="nv">widget</span><span class="pi">:</span> <span class="s2">"</span><span class="s">datetime"</span><span class="pi">}</span>
      <span class="pi">-</span> <span class="pi">{</span><span class="nv">label</span><span class="pi">:</span> <span class="s2">"</span><span class="s">Categories"</span><span class="pi">,</span> <span class="nv">name</span><span class="pi">:</span> <span class="s2">"</span><span class="s">categories"</span><span class="pi">,</span> <span class="nv">widget</span><span class="pi">:</span> <span class="s2">"</span><span class="s">list"</span><span class="pi">,</span> <span class="nv">default</span><span class="pi">:</span> <span class="pi">[</span><span class="s2">"</span><span class="s">general"</span><span class="pi">]}</span>
      <span class="pi">-</span> <span class="pi">{</span><span class="nv">label</span><span class="pi">:</span> <span class="s2">"</span><span class="s">Body"</span><span class="pi">,</span> <span class="nv">name</span><span class="pi">:</span> <span class="s2">"</span><span class="s">body"</span><span class="pi">,</span> <span class="nv">widget</span><span class="pi">:</span> <span class="s2">"</span><span class="s">markdown"</span><span class="pi">}</span>
</code></pre></div></div>

<h2 id="step-4-the-crucial-routing-fix">Step 4: The Crucial Routing Fix</h2>

<p>There is one major “Gotcha” that frustrated me during implementation.</p>

<p>To gain access to your shiny new CMS dashboard, you have to invite yourself via the Netlify Identity panel. Netlify will send you an email with a link that looks like this:
<code class="language-plaintext highlighter-rouge">yourwebsite.com/#invite=token123</code></p>

<p><strong>The Problem:</strong> The email link usually drops you onto your <em>homepage</em>, not the <code class="language-plaintext highlighter-rouge">/admin</code> page. If your homepage doesn’t have the Netlify Identity script loaded, the website won’t know how to intercept that <code class="language-plaintext highlighter-rouge">#invite=</code> URL token! You’ll just see your normal site.</p>

<p><strong>The Fix:</strong> You <em>must</em> inject the Identity script into your global layout template (usually <code class="language-plaintext highlighter-rouge">_layouts/default.html</code>) before the closing <code class="language-plaintext highlighter-rouge">&lt;/head&gt;</code> tag. Furthermore, if you are inviting users from the <code class="language-plaintext highlighter-rouge">github.io</code> domain, you must map the URL in the footer:</p>

<div class="language-html highlighter-rouge"><div class="highlight"><pre class="highlight"><code><span class="c">&lt;!-- Inside &lt;head&gt; of _layouts/default.html --&gt;</span>
<span class="nt">&lt;script </span><span class="na">src=</span><span class="s">"https://identity.netlify.com/v1/netlify-identity-widget.js"</span><span class="nt">&gt;&lt;/script&gt;</span>

<span class="c">&lt;!-- Just before &lt;/body&gt; in _layouts/default.html --&gt;</span>
<span class="nt">&lt;script&gt;</span>
  <span class="k">if</span> <span class="p">(</span><span class="nb">window</span><span class="p">.</span><span class="nx">netlifyIdentity</span><span class="p">)</span> <span class="p">{</span>
    <span class="nb">window</span><span class="p">.</span><span class="nx">netlifyIdentity</span><span class="p">.</span><span class="nx">init</span><span class="p">({</span>
      <span class="na">APIUrl</span><span class="p">:</span> <span class="dl">"</span><span class="s2">https://[your-netlify-url].netlify.app/.netlify/identity</span><span class="dl">"</span>
    <span class="p">});</span>
    <span class="nb">window</span><span class="p">.</span><span class="nx">netlifyIdentity</span><span class="p">.</span><span class="nx">on</span><span class="p">(</span><span class="dl">"</span><span class="s2">init</span><span class="dl">"</span><span class="p">,</span> <span class="nx">user</span> <span class="o">=&gt;</span> <span class="p">{</span>
      <span class="c1">// Identity routing logic...</span>
    <span class="p">});</span>
  <span class="p">}</span>
<span class="nt">&lt;/script&gt;</span>
</code></pre></div></div>

<p>Now, no matter where the invite email links you, the Identity widget will catch the token and open the setup modal!</p>

<h2 id="step-5-invite-yourself-and-publish">Step 5: Invite Yourself and Publish</h2>

<ol>
  <li>Go back to your Netlify Dashboard and click the <strong>Identity</strong> tab at the top.</li>
  <li>Click <strong>Invite Users</strong> and send an invite to your email.</li>
  <li>Click the link in your email, set your password in the modal, and you are in!</li>
</ol>

<p>Navigating to <code class="language-plaintext highlighter-rouge">yourwebsite.com/admin/</code> will now greet you with a beautiful, rich-text WYSIWYG editor. You can drag and drop images, assign categories natively, and write your technical documentation naturally.</p>

<p>When you click “Publish”, the CMS handles the Git pipeline invisibly in the background. It is truly the ultimate blend of static-site performance and modern content management.</p>

<p><br /></p>

<blockquote>
  <p>[!TIP]
You can easily expand your <code class="language-plaintext highlighter-rouge">admin/config.yml</code> to define multiple collections. For example, I have a second collection mapping directly to my <code class="language-plaintext highlighter-rouge">_projects</code> repository to easily update my portfolio showcases!</p>
</blockquote>]]></content><author><name>Ajay Kumar Gupt</name></author><category term="general" /><category term="system-design" /><summary type="html"><![CDATA[There is an undeniable beauty to static site generators like Jekyll, Hugo, and Next.js. They are incredibly fast, ridiculously secure, and can be hosted for completely free on GitHub Pages.]]></summary></entry><entry><title type="html">Reconstructing Files from FTP Network Traffic: Understanding FTP, PCAP, and TCP Reassembly</title><link href="https://ajay3007.github.io/blog/2026/02/01/ftp-file-reconstruction/" rel="alternate" type="text/html" title="Reconstructing Files from FTP Network Traffic: Understanding FTP, PCAP, and TCP Reassembly" /><published>2026-02-01T00:00:00+00:00</published><updated>2026-02-01T00:00:00+00:00</updated><id>https://ajay3007.github.io/blog/2026/02/01/ftp-file-reconstruction</id><content type="html" xml:base="https://ajay3007.github.io/blog/2026/02/01/ftp-file-reconstruction/"><![CDATA[<p>During a recent interview assignment, I was asked to design a system that could reconstruct a file transferred using FTP by analyzing raw network traffic. This task helped me understand how real-world file transfers work at the protocol level.</p>

<p>In this post, I’ll explain the core concepts behind FTP, Active and Passive modes, and how I used PCAP analysis and TCP reassembly to solve the problem.</p>

<hr />

<h2 id="what-is-ftp">What is FTP?</h2>

<p>FTP (File Transfer Protocol) is one of the oldest protocols used to transfer files over a network.</p>

<p>It works on top of TCP and is mainly used to:</p>

<ul>
  <li>Upload files to servers</li>
  <li>Download files from servers</li>
  <li>Manage remote directories</li>
</ul>

<p>FTP is simple, reliable, and still used in many legacy and internal systems.</p>

<p>However, traditional FTP does <strong>not encrypt data</strong>, which makes it useful for learning and traffic analysis.</p>

<hr />

<h2 id="why-is-ftp-used">Why is FTP Used?</h2>

<p>FTP is used because:</p>

<ul>
  <li>It is easy to implement</li>
  <li>It supports large file transfers</li>
  <li>It works well over TCP</li>
  <li>It is supported by almost all operating systems</li>
</ul>

<p>In many internal networks and testing environments, FTP is still widely used.</p>

<p>For my assignment, FTP was chosen because it allows capturing raw file data from the network.</p>

<hr />

<h2 id="two-connections-in-ftp">Two Connections in FTP</h2>

<p>Unlike most protocols, FTP uses <strong>two TCP connections</strong>:</p>

<table>
  <thead>
    <tr>
      <th>Connection Type</th>
      <th>Purpose</th>
      <th>Default Port</th>
    </tr>
  </thead>
  <tbody>
    <tr>
      <td>Control Channel</td>
      <td>Commands and responses</td>
      <td>21</td>
    </tr>
    <tr>
      <td>Data Channel</td>
      <td>File transfer</td>
      <td>Dynamic</td>
    </tr>
  </tbody>
</table>

<ul>
  <li>The <strong>control channel</strong> handles login and commands.</li>
  <li>The <strong>data channel</strong> carries actual file bytes.</li>
</ul>

<p>Understanding this separation is critical for packet analysis.</p>

<hr />

<h2 id="passive-ftp-pasv--epsv-mode">Passive FTP (PASV / EPSV Mode)</h2>

<p>In Passive mode, the <strong>server opens a data port</strong> and tells the client where to connect.</p>

<h3 id="flow">Flow:</h3>

<div class="language-java highlighter-rouge"><div class="highlight"><pre class="highlight"><code><span class="nc">Client</span> <span class="err">→</span> <span class="nc">Server</span> <span class="o">(</span><span class="mi">21</span><span class="o">)</span>
<span class="nc">Server</span> <span class="err">→</span> <span class="nc">Client</span> <span class="o">(</span><span class="no">PASV</span> <span class="o">/</span> <span class="no">EPSV</span> <span class="n">response</span><span class="o">)</span>
<span class="nc">Client</span> <span class="err">→</span> <span class="nc">Server</span> <span class="o">(</span><span class="nc">Data</span> <span class="nc">Port</span><span class="o">)</span>
</code></pre></div></div>

<h3 id="examples">Examples</h3>

<p>IPv4:</p>

<div class="language-bash highlighter-rouge"><div class="highlight"><pre class="highlight"><code>227 <span class="o">(</span>192,168,1,5,32,144<span class="o">)</span>
</code></pre></div></div>

<p>IPv6:</p>

<div class="language-bash highlighter-rouge"><div class="highlight"><pre class="highlight"><code>229 <span class="o">(||</span>|49210|<span class="o">)</span>
</code></pre></div></div>

<h3 id="why-passive-mode-exists">Why Passive Mode Exists</h3>

<p>Passive FTP is widely used because:</p>

<ul>
  <li>It works behind firewalls</li>
  <li>It works with NAT</li>
  <li>It avoids incoming connections to clients</li>
</ul>

<p>Most modern FTP clients use passive mode by default.</p>

<hr />

<h2 id="active-ftp-port--eprt-mode">Active FTP (PORT / EPRT Mode)</h2>

<p>In Active mode, the <strong>client opens a port</strong> and asks the server to connect.</p>

<h3 id="flow-1">Flow:</h3>

<div class="language-bash highlighter-rouge"><div class="highlight"><pre class="highlight"><code>Client → Server <span class="o">(</span>21<span class="o">)</span>
Client → Server <span class="o">(</span>PORT / EPRT<span class="o">)</span>
Server → Client <span class="o">(</span>Data Port<span class="o">)</span>
</code></pre></div></div>

<h3 id="examples-1">Examples</h3>

<p>IPv4:</p>

<div class="language-bash highlighter-rouge"><div class="highlight"><pre class="highlight"><code>PORT 192,168,1,5,32,144
</code></pre></div></div>

<p>IPv6:</p>

<div class="language-bash highlighter-rouge"><div class="highlight"><pre class="highlight"><code>EPRT |2|::1|8336|
</code></pre></div></div>

<h3 id="limitations-of-active-mode">Limitations of Active Mode</h3>

<p>Active FTP often fails because:</p>

<ul>
  <li>Firewalls block incoming connections</li>
  <li>NAT breaks address mapping</li>
</ul>

<p>This is why Active mode is rarely used today.</p>

<hr />

<h2 id="problem-statement-of-my-assignment">Problem Statement of My Assignment</h2>

<p>The assignment required me to:</p>

<ol>
  <li>Transfer a file using FTP</li>
  <li>Capture traffic using tcpdump</li>
  <li>Analyze the PCAP file</li>
  <li>Extract raw bytes</li>
  <li>Reconstruct the original file</li>
</ol>

<p>The main challenge was handling multiple TCP packets and rebuilding the file correctly.</p>

<hr />

<h2 id="understanding-pcap-files">Understanding PCAP Files</h2>

<p>A PCAP file stores raw network packets captured from an interface.</p>

<p>Each packet contains:</p>

<ul>
  <li>Link Layer Header</li>
  <li>IP Header (IPv4 / IPv6)</li>
  <li>TCP Header</li>
  <li>Application Data</li>
</ul>

<p>My program reads PCAP files using <code class="language-plaintext highlighter-rouge">libpcap</code> and extracts TCP payloads.</p>

<hr />

<h2 id="tcp-reassembly">TCP Reassembly</h2>

<p>TCP splits large data into small segments.</p>

<p>Packets may arrive:</p>

<ul>
  <li>Out of order</li>
  <li>Duplicated</li>
  <li>Delayed</li>
</ul>

<p>So reconstruction requires:</p>

<ol>
  <li>Collecting all segments</li>
  <li>Sorting by sequence number</li>
  <li>Removing duplicates</li>
  <li>Writing in correct order</li>
</ol>

<p>This process is called <strong>TCP reassembly</strong>.</p>

<hr />

<h2 id="handling-ipv4-and-ipv6">Handling IPv4 and IPv6</h2>

<p>Originally, my implementation only supported IPv4.</p>

<p>Later, I upgraded it to support IPv6 by:</p>

<ul>
  <li>Detecting IP version</li>
  <li>Parsing IPv6 headers</li>
  <li>Supporting EPSV mode</li>
  <li>Using unified IP address structures</li>
</ul>

<p>This made the tool dual-stack compatible.</p>

<hr />

<h2 id="tools-and-technologies-used">Tools and Technologies Used</h2>

<table>
  <thead>
    <tr>
      <th>Tool</th>
      <th>Purpose</th>
    </tr>
  </thead>
  <tbody>
    <tr>
      <td>C++</td>
      <td>Core implementation</td>
    </tr>
    <tr>
      <td>libpcap</td>
      <td>Packet parsing</td>
    </tr>
    <tr>
      <td>tcpdump</td>
      <td>Packet capture</td>
    </tr>
    <tr>
      <td>Pure-FTPd</td>
      <td>FTP server</td>
    </tr>
    <tr>
      <td>CMake</td>
      <td>Build system</td>
    </tr>
    <tr>
      <td>Wireshark</td>
      <td>Debugging</td>
    </tr>
  </tbody>
</table>

<hr />

<h2 id="key-learnings">Key Learnings</h2>

<p>Through this project, I learned:</p>

<ul>
  <li>How FTP works internally</li>
  <li>Difference between Active and Passive modes</li>
  <li>How TCP ensures reliability</li>
  <li>How packet captures are structured</li>
  <li>How to reconstruct application data from network traffic</li>
  <li>How to design modular C++ systems</li>
</ul>

<hr />

<h2 id="conclusion">Conclusion</h2>

<p>This assignment helped me move from using networking tools to understanding how they work internally.</p>

<p>Reconstructing a file from raw packets gave me hands-on experience with real-world networking and systems programming.</p>

<p>In future, I plan to extend this project with:</p>

<ul>
  <li>Active FTP support</li>
  <li>Multi-session handling</li>
  <li>Advanced retransmission recovery</li>
  <li>Better CLI filters</li>
</ul>

<hr />

<div style="text-align: center; margin-top: 3rem; padding-top: 2rem; border-top: 1px solid #e2e8f0;">
  <a href="/blogs" style="display:inline-block;padding:10px 20px;background:#667eea;color:white;border-radius:5px;text-decoration:none;margin-right:10px;">← All Blogs</a>
  <a href="/" style="display:inline-block;padding:10px 20px;background:#764ba2;color:white;border-radius:5px;text-decoration:none;">Home 🏠</a>
</div>]]></content><author><name>Ajay Kumar Gupt</name></author><category term="data-plane" /><category term="system-design" /><summary type="html"><![CDATA[During a recent interview assignment, I was asked to design a system that could reconstruct a file transferred using FTP by analyzing raw network traffic. This task helped me understand how real-world file transfers work at the protocol level.]]></summary></entry><entry><title type="html">How to Create a New GitHub Repo and Push a Local Project</title><link href="https://ajay3007.github.io/blog/2026/01/18/create-new-github-repo/" rel="alternate" type="text/html" title="How to Create a New GitHub Repo and Push a Local Project" /><published>2026-01-18T00:00:00+00:00</published><updated>2026-01-18T00:00:00+00:00</updated><id>https://ajay3007.github.io/blog/2026/01/18/create-new-github-repo</id><content type="html" xml:base="https://ajay3007.github.io/blog/2026/01/18/create-new-github-repo/"><![CDATA[<h1 id="how-to-create-a-new-github-repo-and-push-a-local-project-">How to Create a New GitHub Repo and Push a Local Project 🚀</h1>

<p>When you start a new project locally (Java, DSA notes, website, etc.), the next step is usually to push it into GitHub. This guide explains the complete workflow to:</p>

<p>✅ Create a new GitHub repository<br />
✅ Initialize Git in your local project<br />
✅ Commit your code<br />
✅ Push it to GitHub</p>

<p>This is a reusable step-by-step process you can follow for any future project.</p>

<hr />

<h2 id="prerequisites">Prerequisites</h2>

<p>Before starting, make sure you have:</p>

<ul>
  <li>A GitHub account</li>
  <li>Git installed on your system</li>
</ul>

<p>Check Git installation:</p>

<div class="language-bash highlighter-rouge"><div class="highlight"><pre class="highlight"><code>git <span class="nt">--version</span>
</code></pre></div></div>

<hr />

<h2 id="step-1-create-a-new-repository-on-github">Step 1: Create a New Repository on GitHub</h2>

<ol>
  <li>Open GitHub and click <strong>”+” → New repository</strong></li>
  <li>Enter a repository name<br />
Example: <code class="language-plaintext highlighter-rouge">JavaFoundry</code></li>
  <li>Choose repo visibility:
    <ul>
      <li>✅ Public (recommended for portfolio)</li>
      <li>🔒 Private (if needed)</li>
    </ul>
  </li>
  <li><strong>Important:</strong> Do <strong>NOT</strong> check:
    <ul>
      <li>“Add a README”</li>
      <li>“Add .gitignore”</li>
      <li>“Add license”</li>
    </ul>
  </li>
</ol>

<p>(We will create them locally.)</p>

<ol>
  <li>Click <strong>Create repository</strong></li>
</ol>

<p>GitHub will show the repo URL like:</p>

<ul>
  <li>HTTPS: <code class="language-plaintext highlighter-rouge">https://github.com/&lt;username&gt;/&lt;repo&gt;.git</code></li>
  <li>SSH: <code class="language-plaintext highlighter-rouge">git@github.com:&lt;username&gt;/&lt;repo&gt;.git</code></li>
</ul>

<hr />

<h2 id="step-2-open-terminal-in-your-local-project-folder">Step 2: Open Terminal in Your Local Project Folder</h2>

<p>Navigate into your project folder:</p>

<div class="language-bash highlighter-rouge"><div class="highlight"><pre class="highlight"><code><span class="nb">cd </span>path/to/your/project
</code></pre></div></div>

<p>Verify files:</p>

<div class="language-bash highlighter-rouge"><div class="highlight"><pre class="highlight"><code><span class="nb">ls</span>
</code></pre></div></div>

<hr />

<h2 id="step-3-initialize-git-in-your-local-folder">Step 3: Initialize Git in Your Local Folder</h2>

<p>Run:</p>

<div class="language-bash highlighter-rouge"><div class="highlight"><pre class="highlight"><code>git init
</code></pre></div></div>

<p>Now your folder becomes a Git repository.</p>

<hr />

<h2 id="step-4-add-a-gitignore-file-recommended">Step 4: Add a <code class="language-plaintext highlighter-rouge">.gitignore</code> File (Recommended)</h2>

<p>A <code class="language-plaintext highlighter-rouge">.gitignore</code> tells Git what <strong>NOT</strong> to push to GitHub.</p>

<p>Create <code class="language-plaintext highlighter-rouge">.gitignore</code>:</p>

<div class="language-bash highlighter-rouge"><div class="highlight"><pre class="highlight"><code><span class="nb">touch</span> .gitignore
</code></pre></div></div>

<p>For Java + IntelliJ projects, add:</p>

<pre><code class="language-gitignore"># IntelliJ IDEA
.idea/
*.iml

# Java build output
out/
target/
*.class

# OS files
.DS_Store
Thumbs.db
</code></pre>

<hr />

<h2 id="step-5-stage-your-code">Step 5: Stage Your Code</h2>

<p>Stage everything:</p>

<div class="language-bash highlighter-rouge"><div class="highlight"><pre class="highlight"><code>git add <span class="nb">.</span>
</code></pre></div></div>

<p>Check status:</p>

<div class="language-bash highlighter-rouge"><div class="highlight"><pre class="highlight"><code>git status
</code></pre></div></div>

<hr />

<h2 id="step-6-commit-your-changes">Step 6: Commit Your Changes</h2>

<p>Commit with a meaningful message:</p>

<div class="language-bash highlighter-rouge"><div class="highlight"><pre class="highlight"><code>git commit <span class="nt">-m</span> <span class="s2">"Initial commit"</span>
</code></pre></div></div>

<hr />

<h2 id="step-7-link-local-repo-with-github-repo-add-remote">Step 7: Link Local Repo with GitHub Repo (Add Remote)</h2>

<p>Add the GitHub remote:</p>

<h3 id="-using-https">✅ Using HTTPS</h3>
<div class="language-bash highlighter-rouge"><div class="highlight"><pre class="highlight"><code>git remote add origin https://github.com/&lt;username&gt;/&lt;repo&gt;.git
</code></pre></div></div>

<p>Verify remote:</p>

<div class="language-bash highlighter-rouge"><div class="highlight"><pre class="highlight"><code>git remote <span class="nt">-v</span>
</code></pre></div></div>

<hr />

<h2 id="step-8-push-your-code-to-github">Step 8: Push Your Code to GitHub</h2>

<p>Rename branch to <code class="language-plaintext highlighter-rouge">main</code> (GitHub standard):</p>

<div class="language-bash highlighter-rouge"><div class="highlight"><pre class="highlight"><code>git branch <span class="nt">-M</span> main
</code></pre></div></div>

<p>Push code:</p>

<div class="language-bash highlighter-rouge"><div class="highlight"><pre class="highlight"><code>git push <span class="nt">-u</span> origin main
</code></pre></div></div>

<p>✅ Done — your local project is now available on GitHub.</p>

<hr />

<h2 id="step-9-verify-on-github">Step 9: Verify on GitHub</h2>

<p>Go to your repo page and refresh. You should see:</p>

<ul>
  <li>all your files</li>
  <li>latest commit message</li>
  <li>branch <code class="language-plaintext highlighter-rouge">main</code></li>
</ul>

<hr />

<h1 id="common-errors-and-fixes">Common Errors and Fixes</h1>

<h2 id="1--remote-origin-already-exists">1) ❌ <code class="language-plaintext highlighter-rouge">remote origin already exists</code></h2>

<p>Fix:</p>

<div class="language-bash highlighter-rouge"><div class="highlight"><pre class="highlight"><code>git remote remove origin
git remote add origin https://github.com/&lt;username&gt;/&lt;repo&gt;.git
</code></pre></div></div>

<hr />

<h2 id="2--authentication-failed-https">2) ❌ Authentication Failed (HTTPS)</h2>

<p>GitHub no longer allows password authentication for git pushes.</p>

<p>✅ Fix options:</p>
<ul>
  <li>Use <strong>Personal Access Token (PAT)</strong> as password</li>
  <li>OR use <strong>SSH</strong></li>
  <li>OR use <strong>GitHub Desktop</strong> (easy UI)</li>
</ul>

<hr />

<h1 id="recommended-workflow-for-future-updates">Recommended Workflow for Future Updates</h1>

<p>Whenever you make changes:</p>

<div class="language-bash highlighter-rouge"><div class="highlight"><pre class="highlight"><code>git add <span class="nb">.</span>
git commit <span class="nt">-m</span> <span class="s2">"Updated notes: Constructors + GC"</span>
git push
</code></pre></div></div>

<hr />

<h1 id="bonus-best-repo-structure-for-learning-projects">Bonus: Best Repo Structure for Learning Projects</h1>

<p>If you’re building a learning repo like JavaFoundry:</p>

<div class="language-plaintext highlighter-rouge"><div class="highlight"><pre class="highlight"><code>JavaFoundry/
├── src/
├── notes/
│   ├── constructors.md
│   ├── methods.md
│   └── memory-management-gc.md
├── diagrams/
│   └── *.puml
├── README.md
└── .gitignore
</code></pre></div></div>

<p>This makes your repo clean and scalable.</p>

<hr />

<h2 id="summary">Summary</h2>

<p>✅ Create repo on GitHub<br />
✅ <code class="language-plaintext highlighter-rouge">git init</code> locally<br />
✅ <code class="language-plaintext highlighter-rouge">git add .</code><br />
✅ <code class="language-plaintext highlighter-rouge">git commit -m "..."</code><br />
✅ <code class="language-plaintext highlighter-rouge">git remote add origin &lt;url&gt;</code><br />
✅ <code class="language-plaintext highlighter-rouge">git push -u origin main</code></p>

<hr />

<div style="text-align: center; margin-top: 3rem; padding-top: 2rem; border-top: 1px solid #e2e8f0;">
  <a href="/blogs" style="display:inline-block;padding:10px 20px;background:#667eea;color:white;border-radius:5px;text-decoration:none;margin-right:10px;">← All Blogs</a>
  <a href="/" style="display:inline-block;padding:10px 20px;background:#764ba2;color:white;border-radius:5px;text-decoration:none;">Home 🏠</a>
</div>]]></content><author><name>Ajay Kumar Gupt</name></author><category term="general" /><summary type="html"><![CDATA[When you start a new project locally (Java, DSA notes, website, etc.), the next step is usually to push it into GitHub. This guide explains the complete workflow.]]></summary></entry><entry><title type="html">🇺🇸 Treasury Bond kya hota hai? India ne US Treasury holdings 2025 me 21% kyun kam ki?</title><link href="https://ajay3007.github.io/blog/2026/01/12/india-us-treasury-holdings-explained/" rel="alternate" type="text/html" title="🇺🇸 Treasury Bond kya hota hai? India ne US Treasury holdings 2025 me 21% kyun kam ki?" /><published>2026-01-12T00:00:00+00:00</published><updated>2026-01-12T00:00:00+00:00</updated><id>https://ajay3007.github.io/blog/2026/01/12/india-us-treasury-holdings-explained</id><content type="html" xml:base="https://ajay3007.github.io/blog/2026/01/12/india-us-treasury-holdings-explained/"><![CDATA[<h1 id="bond-kya-hota-hai-india-ne-us-treasury-holdings-2025-me-21-kyun-kam-ki">Bond kya hota hai? India ne US Treasury holdings 2025 me 21% kyun kam ki?</h1>

<p>Aapne kabhi news me suna hoga:</p>

<blockquote>
  <p>
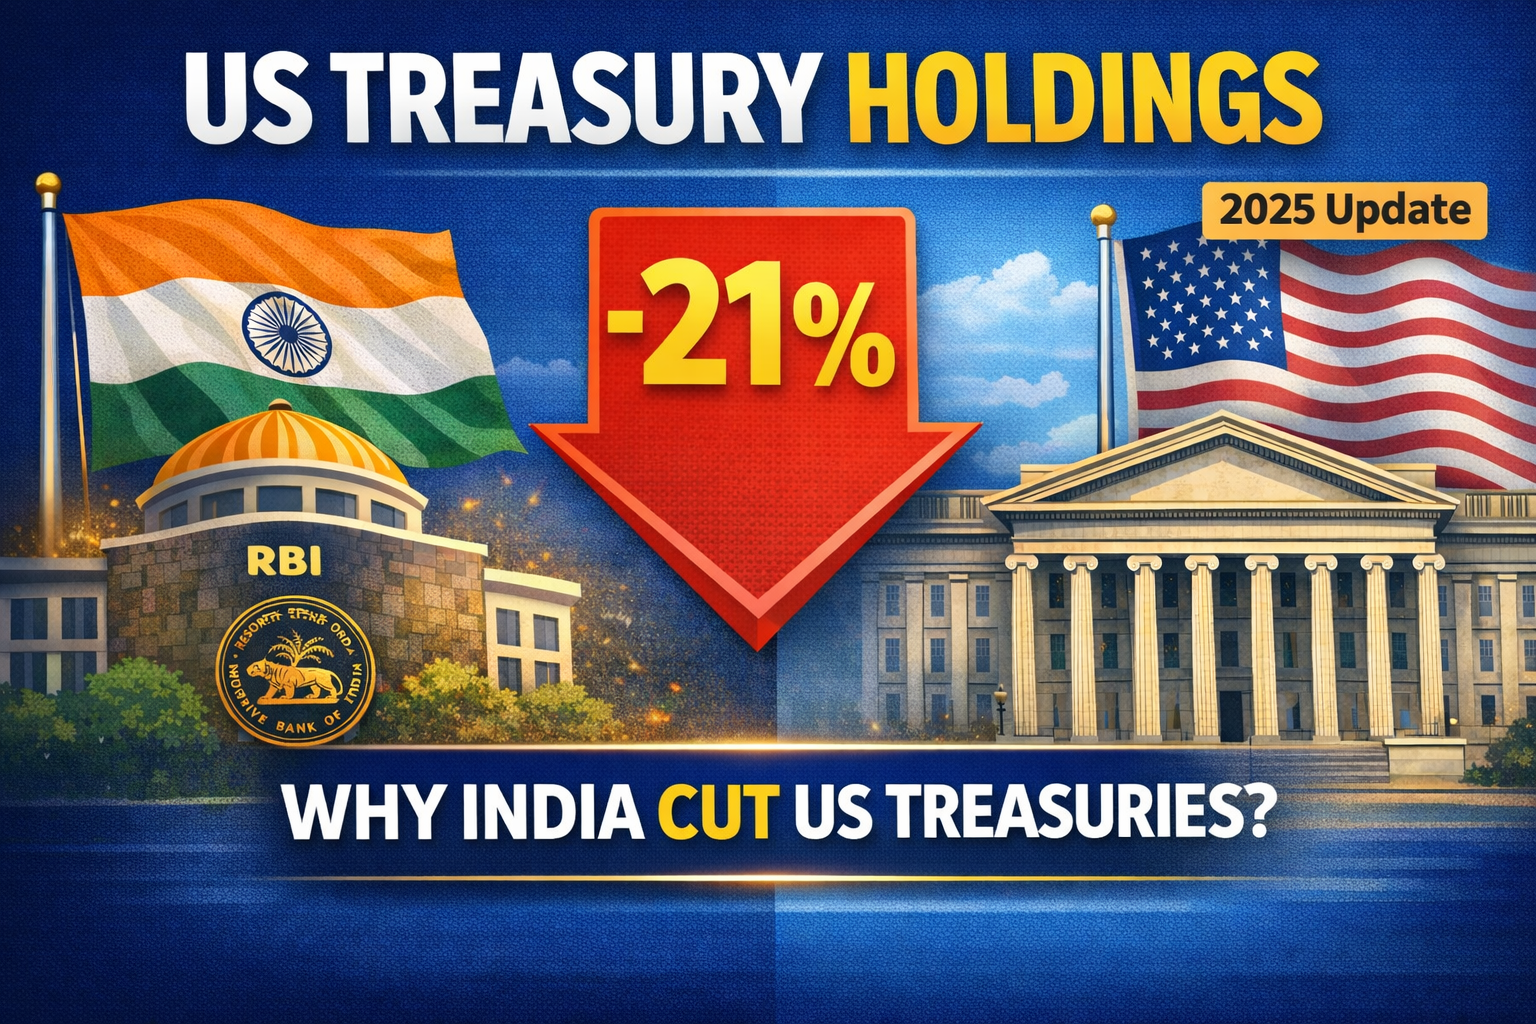
“India ne US Treasury holdings 21% reduce ki.”</p>
</blockquote>

<p>Lekin asli question ye hai 👇</p>
<ul>
  <li>✅ US Treasury hota kya hai?</li>
  <li>✅ India apna paisa wahan kyun rakhta hai?</li>
  <li>✅ Aur 2025 me cut kyun kiya?</li>
</ul>

<p>Chaliye isko ekdum asaan language me samajhte hain.</p>

<hr />

<h2 id="-quick-summary-30-sec-read">✅ Quick Summary (30 sec read)</h2>

<ul>
  <li>📌 <strong>Treasury bond</strong> = US government ko loan</li>
  <li>📌 <strong>India (RBI)</strong> apne Forex Reserves ka part US Treasury me invest karta hai</li>
  <li>📌 <strong>2025 me</strong> India ki holdings ~$241.4B se ~$190.7B ho gayi (~21% down)</li>
  <li>📌 <strong>Main reason:</strong> Diversification + risk management (gold / non-dollar assets)</li>
</ul>

<hr />

<h2 id="1️⃣-treasury-bond-ka-matlab-kya-hota-hai-">1️⃣ Treasury Bond ka matlab kya hota hai? 💵</h2>

<p><strong>Treasury Bond (T-Bond)</strong> = Government ka loan instrument</p>

<p>Jab government ko paise chahiye hote hain, wo public/institutions se udhaar leti hai, aur uske badle bond deti hai.</p>

<h3 id="simple-example">Simple example:</h3>

<p><strong>Government:</strong> “Mujhe ₹10,000 udhaar do 10 saal ke liye. Main har saal interest dungi, aur maturity par ₹10,000 wapas kar dungi.”</p>

<ul>
  <li>✅ <strong>Interest</strong> = Coupon</li>
  <li>✅ <strong>Return date</strong> = Maturity</li>
</ul>

<hr />

<h2 id="2️⃣-t-bill-vs-treasury-bond-">2️⃣ T-Bill vs Treasury Bond 🧾</h2>

<table>
  <thead>
    <tr>
      <th>Feature</th>
      <th>T-Bill</th>
      <th>Treasury Bond</th>
    </tr>
  </thead>
  <tbody>
    <tr>
      <td><strong>Duration</strong></td>
      <td>Short term (&lt;= 1 year)</td>
      <td>Long term (1+ years)</td>
    </tr>
    <tr>
      <td><strong>Interest</strong></td>
      <td>Coupon nahi hota</td>
      <td>Regular coupon interest</td>
    </tr>
    <tr>
      <td><strong>Return</strong></td>
      <td>Discount based</td>
      <td>Coupon + maturity value</td>
    </tr>
  </tbody>
</table>

<h3 id="-easy-line">📌 Easy line:</h3>

<ul>
  <li>✅ <strong>T-Bill</strong> = short term parking</li>
  <li>✅ <strong>Bond</strong> = long term stable income</li>
</ul>

<hr />

<h2 id="3️⃣-interest-rate-aur-bond-price-ulta-kyun-chalta-hai-">3️⃣ Interest rate aur bond price ulta kyun chalta hai? 📉📈</h2>

<h3 id="golden-rule">Golden rule:</h3>

<ul>
  <li>📌 Interest rate <strong>badhta</strong> hai → old bond ka price <strong>girta</strong> hai</li>
  <li>📌 Interest rate <strong>ghatta</strong> hai → old bond ka price <strong>badhta</strong> hai</li>
</ul>

<h3 id="-example-super-simple">🔥 Example (super simple)</h3>

<p>Maan lo aapke paas <strong>old bond</strong> hai:</p>
<ul>
  <li><strong>Face value:</strong> ₹1000</li>
  <li><strong>Coupon:</strong> 7% → yearly ₹70</li>
</ul>

<p>Ab <strong>new bonds</strong> market me 10% dene lage:</p>
<ul>
  <li><strong>New bond yield:</strong> 10% → yearly ₹100</li>
</ul>

<p><strong>Investor kya sochega?</strong></p>

<blockquote>
  <p>“Old bond (₹70) kyu loon jab new bond (₹100) mil raha?”</p>
</blockquote>

<p>Toh old bond sell karne ke liye uska price <strong>cheap</strong> hona padega.</p>

<p>✅ <strong>Isliye:</strong> Rates ↑ → Old Bond price ↓</p>

<h3 id="reverse-case">Reverse case:</h3>

<p>Agar market rate 7% ho gaya aur old bond 10% de raha, toh old bond <strong>valuable</strong> ban jaata hai → price badhta hai.</p>

<p>✅ <strong>Isliye:</strong> Rates ↓ → Old Bond price ↑</p>

<blockquote>
  <p><strong>💡 Callout:</strong> Bond me coupon fixed hota hai, market rates change hote rehte hain. Isi wajah se bond ka price ulta chalta hai.</p>
</blockquote>

<hr />

<h2 id="4️⃣-india-us-treasuries-kyun-buy-karta-hai-">4️⃣ India US Treasuries kyun buy karta hai? 🇮🇳💰🇺🇸</h2>

<p>India ke paas <strong>Forex Reserves</strong> hote hain — matlab foreign currency savings.</p>

<h3 id="forex-reserves-ka-use">Forex reserves ka use:</h3>

<ol>
  <li>INR stability maintain karna</li>
  <li>Imports &amp; global payments</li>
  <li>Crisis buffer</li>
  <li>Global confidence</li>
</ol>

<p>RBI forex reserves ko <strong>safe + liquid assets</strong> me invest karta hai.</p>

<h3 id="-us-treasuries-popular-isliye">✅ US Treasuries popular isliye:</h3>

<ul>
  <li><strong>Very safe</strong></li>
  <li><strong>Highly liquid</strong> (jaldi bech sakte)</li>
  <li><strong>USD</strong> global currency hai</li>
</ul>

<hr />

<h2 id="5️⃣-rbi-forex-reserves-ka-breakdown-">5️⃣ RBI Forex Reserves ka breakdown 🍰</h2>

<p>Forex reserves mainly <strong>4 parts:</strong></p>

<ol>
  <li><strong>Foreign Currency Assets (FCA)</strong> – sabse bada part</li>
  <li><strong>Gold</strong></li>
  <li><strong>SDR</strong> (IMF asset)</li>
  <li><strong>IMF reserve position</strong></li>
</ol>

<p>👉 <strong>US Treasuries</strong> FCA ke andar aate hain.</p>

<hr />

<h2 id="6️⃣-news-analysis-india-ne-2025-me-21-holdings-kyun-kam-ki-">6️⃣ News analysis: India ne 2025 me 21% holdings kyun kam ki? 📰</h2>

<div style="text-align:center;margin:2rem 0;">
  <img src="/assets/images/rbi-us-treasury-cut.png" alt="India US Treasury Holdings Reduction" style="max-width:100%;width:auto;max-height:500px;border-radius:8px;box-shadow:0 2px 12px rgba(0,0,0,0.1);" />
</div>

<p>News ke according:</p>
<ul>
  <li><strong>Oct 2024:</strong> ~$241.4B</li>
  <li><strong>Oct 2025:</strong> ~$190.7B</li>
  <li>➡️ <strong>~21% reduction</strong></li>
</ul>

<h3 id="iska-matlab">Iska matlab?</h3>

<ul>
  <li>❌ Ye <strong>“trust issue”</strong> nahi hai</li>
  <li>✅ Ye <strong>“portfolio optimization / diversification”</strong> hai</li>
</ul>

<hr />

<h2 id="7️⃣-major-reasons-simple-analysis-">7️⃣ Major reasons (simple analysis) 🧠</h2>

<h3 id="-reason-1-diversification">✅ Reason 1: Diversification</h3>

<p>RBI sirf US assets pe dependent nahi rehna chahta:</p>
<ul>
  <li>Gold badhana</li>
  <li>Other currencies/assets badhana</li>
</ul>

<h3 id="-reason-2-dollar-weaken-risk">✅ Reason 2: Dollar weaken risk</h3>

<p>Agar USD weaken hota hai toh return impact ho sakta hai. Isliye RBI balance karta hai.</p>

<h3 id="-reason-3-fed-rate-cycle">✅ Reason 3: Fed rate cycle</h3>

<p>US rates/yields change hote rehte hain. RBI apna <strong>duration risk / allocation</strong> adjust karta hai.</p>

<h3 id="-reason-4-global-uncertainty">✅ Reason 4: Global uncertainty</h3>

<p>Geopolitical uncertainty badhne par central banks apne reserves ka structure rethink karte hain.</p>

<hr />

<h2 id="8️⃣-iska-inrusd-pe-kya-impact-">8️⃣ Iska INR/USD pe kya impact? 💱</h2>

<p><strong>Immediate direct impact</strong> usually small hota hai, because RBI actively manage karta hai.</p>

<h3 id="but-indirectly">But indirectly:</h3>

<ul>
  <li>Reserves <strong>flexible</strong> ban jaate hain</li>
  <li>Currency intervention <strong>easier</strong> ho sakta hai</li>
  <li>Risk hedging <strong>better</strong> hoti hai</li>
</ul>

<hr />

<h2 id="-key-takeaways-1-minute-recap">✅ Key Takeaways (1-minute recap)</h2>

<ol>
  <li><strong>Treasury bond</strong> = government ko loan</li>
  <li><strong>T-Bill</strong> = short term, discount based</li>
  <li><strong>Interest rate ↑</strong> ⇒ old bond price ↓</li>
  <li><strong>Interest rate ↓</strong> ⇒ old bond price ↑</li>
  <li>RBI forex reserves me US Treasuries <strong>important asset</strong> hain</li>
  <li>India ne holdings reduce ki: main reason <strong>diversification + risk management</strong></li>
</ol>

<hr />

<h2 id="faqs-">FAQs ❓</h2>

<h3 id="q1-treasury-bond-safe-hota-hai">Q1. Treasury bond safe hota hai?</h3>

<p><strong>Haan</strong>, generally world ka safest asset category me count hota hai.</p>

<h3 id="q2-t-bill-aur-bond-me-key-difference">Q2. T-Bill aur bond me key difference?</h3>

<p>T-bill <strong>short term</strong> hota hai aur <strong>discount return</strong> deta hai; bond <strong>long term</strong> hota hai aur <strong>coupon</strong> deta hai.</p>

<h3 id="q3-kya-india-us-se-distance-bana-raha-hai">Q3. Kya India US se distance bana raha hai?</h3>

<p><strong>Nahi.</strong> Ye exit nahi hai — <strong>diversification strategy</strong> hai.</p>

<h3 id="q4-bond-price-rate-ke-opposite-kyu-hota">Q4. Bond price rate ke opposite kyu hota?</h3>

<p>Coupon <strong>fixed</strong> hota, market rate <strong>change</strong> hota — isliye price adjust hota.</p>

<hr />

<h2 id="️-final-line">✍️ Final line</h2>

<p>India ne US Treasury holdings reduce kiye because RBI apne forex reserves ko <strong>“more diversified &amp; future-proof”</strong> banana chahta hai.</p>

<p>Ye ek <strong>healthy financial strategy</strong> hai, <strong>trust issue</strong> nahi! 💪</p>

<hr />

<div style="background: linear-gradient(135deg, rgba(0,212,255,0.06), rgba(255,107,157,0.04)); border-left: 4px solid var(--secondary-color); border-radius: 8px; padding: 1.5rem; margin: 2rem 0;">
  <p style="margin: 0; font-style: italic; color: var(--light-text);">
    💡 <strong>Pro Tip:</strong> Treasury bonds aur forex reserves ki understanding aapko global economy ke patterns samajhne me help karti hai. Next time jab bhi "Treasury yields" ya "Fed rates" news me aaye, aap context samajh paoge!
  </p>
</div>

<hr />

<div style="text-align: center; margin-top: 3rem; padding-top: 2rem; border-top: 1px solid #e2e8f0;">
  <a href="/blogs" style="display:inline-block;padding:10px 20px;background:#667eea;color:white;border-radius:5px;text-decoration:none;margin-right:10px;">← All Blogs</a>
  <a href="/" style="display:inline-block;padding:10px 20px;background:#764ba2;color:white;border-radius:5px;text-decoration:none;">Home 🏠</a>
</div>]]></content><author><name>Ajay Kumar Gupt</name></author><category term="finance" /><category term="economics" /><summary type="html"><![CDATA[US Treasury bonds, T-Bills, aur India ke Forex Reserves ki simple explanation. Jano ki RBI ne 2025 me US Treasury holdings 21% kyun reduce ki - diversification, risk management, aur portfolio optimization ki complete story.]]></summary></entry><entry><title type="html">DevToolBox: A Comprehensive Network Packet Analysis Suite</title><link href="https://ajay3007.github.io/blog/2025/12/31/devtoolbox-network-packet-analysis/" rel="alternate" type="text/html" title="DevToolBox: A Comprehensive Network Packet Analysis Suite" /><published>2025-12-31T00:00:00+00:00</published><updated>2025-12-31T00:00:00+00:00</updated><id>https://ajay3007.github.io/blog/2025/12/31/devtoolbox-network-packet-analysis</id><content type="html" xml:base="https://ajay3007.github.io/blog/2025/12/31/devtoolbox-network-packet-analysis/"><![CDATA[<h2 id="introduction">Introduction</h2>

<p>As a developer working with network protocols and data plane technologies, I found myself repeatedly needing tools to analyze packet captures, generate test data, and inspect binary files. Rather than switching between multiple tools, I built <strong>DevToolBox</strong> — a unified web-based suite that brings together four essential utilities in one place.</p>

<p>🔗 <strong><a href="https://github.com/Ajay3007/devtoolbox" target="_blank" rel="noopener noreferrer">GitHub Repository</a></strong></p>

<hr />

<h2 id="-the-problem-space">🎯 The Problem Space</h2>

<p>Network engineers and developers often face these challenges:</p>

<ul>
  <li><strong>PCAP Analysis</strong> — Need to read, modify, and understand network packet captures</li>
  <li><strong>Test Data Generation</strong> — Creating realistic PCAP files for testing network protocols</li>
  <li><strong>Binary Inspection</strong> — Analyzing firmware, protocol payloads, and unknown binary files</li>
  <li><strong>Capture Management</strong> — Merging multiple PCAP files from different sources</li>
</ul>

<p>Existing tools are either:</p>
<ul>
  <li>Command-line based (steep learning curve)</li>
  <li>Desktop applications (platform-specific)</li>
  <li>Limited to single functionality</li>
  <li>Expensive commercial software</li>
</ul>

<p><strong>DevToolBox</strong> addresses this gap with a modern, web-based interface that’s accessible, intuitive, and completely free.</p>

<hr />

<h2 id="️-the-four-core-tools">🛠️ The Four Core Tools</h2>

<h3 id="1-pcap-editor">1. PCAP Editor</h3>

<p>The <strong>PCAP Editor</strong> lets you upload and analyze PCAP/PCAPNG files with detailed packet information:</p>

<ul>
  <li><strong>Protocol Breakdown</strong> — View TCP, UDP, ICMP, DNS, HTTP, TLS packets</li>
  <li><strong>Field Modification</strong> — Edit MAC addresses, IP addresses, ports, VLAN IDs</li>
  <li><strong>Application Layer Editing</strong> — Modify HTTP Host headers, TLS SNI fields, DNS queries</li>
  <li><strong>Automatic Checksums</strong> — Recalculates IP and TCP checksums automatically</li>
  <li><strong>Download Modified Captures</strong> — Export your changes as new PCAP files</li>
</ul>

<p><strong>Use Cases:</strong></p>
<ul>
  <li>Protocol testing and debugging</li>
  <li>Security research and forensics</li>
  <li>Network simulation</li>
  <li>Anonymizing packet captures</li>
</ul>

<h3 id="2-pcap-generator">2. PCAP Generator</h3>

<p>Create synthetic PCAP files with <strong>complete TCP 3-way handshake flows</strong>:</p>

<ul>
  <li><strong>Multiple Protocols</strong> — TCP, HTTP, UDP, DNS (UDP/TCP), TLS</li>
  <li><strong>Realistic Flows</strong> — Full TCP lifecycle: SYN → SYN-ACK → ACK → Data → FIN-ACK</li>
  <li><strong>Incremental IPs</strong> — Generates unique flows with auto-incrementing destination IPs</li>
  <li><strong>VLAN Support</strong> — Add VLAN tagging for enterprise network simulation</li>
  <li><strong>Custom Configuration</strong> — Configure MAC addresses, IPs, ports, packet counts</li>
</ul>

<p><strong>Use Cases:</strong></p>
<ul>
  <li>Creating test datasets</li>
  <li>Load testing network equipment</li>
  <li>Protocol implementation testing</li>
  <li>Network simulation scenarios</li>
</ul>

<h3 id="3-pcap-merger">3. PCAP Merger</h3>

<p>Combine multiple PCAP/PCAPNG files into a single capture:</p>

<ul>
  <li><strong>Preserve Timing</strong> — Maintains original packet timestamps</li>
  <li><strong>Maintain Order</strong> — Keeps chronological packet sequence</li>
  <li><strong>Multi-Format Support</strong> — Works with PCAP and PCAPNG formats</li>
  <li><strong>Automatic Statistics</strong> — Shows packet counts from merged files</li>
</ul>

<p><strong>Use Cases:</strong></p>
<ul>
  <li>Consolidating forensics data</li>
  <li>Merging test captures</li>
  <li>Combining multi-interface captures</li>
  <li>Creating comprehensive datasets</li>
</ul>

<h3 id="4-hex-viewer">4. Hex Viewer</h3>

<p>Upload any binary file and view it with dual modes:</p>

<ul>
  <li><strong>Text View</strong> — Human-readable text with auto-detected encoding (UTF-8, ASCII, Latin-1, UTF-16, UTF-32)</li>
  <li><strong>Hex View</strong> — Traditional hex dump with ASCII representation</li>
  <li><strong>Format Detection</strong> — Automatically identifies JSON, XML, Plain Text, Binary</li>
  <li><strong>Pattern Search</strong> — Search by hex pattern or ASCII text</li>
  <li><strong>Pagination</strong> — Handle large files efficiently</li>
  <li><strong>Export Options</strong> — Copy to clipboard or export as hex dump</li>
</ul>

<p><strong>Use Cases:</strong></p>
<ul>
  <li>Firmware analysis</li>
  <li>Protocol reverse engineering</li>
  <li>File forensics</li>
  <li>Unknown file format inspection</li>
</ul>

<hr />

<h2 id="️-technical-architecture">🏗️ Technical Architecture</h2>

<h3 id="backend-python--flask--scapy">Backend: Python + Flask + Scapy</h3>

<p>The backend is built with:</p>
<ul>
  <li><strong>Flask</strong> — Lightweight REST API server</li>
  <li><strong>Scapy</strong> — Powerful Python library for packet manipulation</li>
  <li><strong>File Handling</strong> — Secure upload/download with size limits</li>
</ul>

<p>Key modules:</p>
<ul>
  <li><code class="language-plaintext highlighter-rouge">app.py</code> — Flask API endpoints</li>
  <li><code class="language-plaintext highlighter-rouge">pcap_handler.py</code> — PCAP processing logic</li>
  <li><code class="language-plaintext highlighter-rouge">utils.py</code> — Helper functions for encoding/checksums</li>
</ul>

<h3 id="frontend-vuejs-3--vite">Frontend: Vue.js 3 + Vite</h3>

<p>The frontend features:</p>
<ul>
  <li><strong>Vue.js 3</strong> — Modern reactive framework</li>
  <li><strong>Vite</strong> — Fast development and build tool</li>
  <li><strong>Axios</strong> — HTTP client for API calls</li>
  <li><strong>Component Architecture</strong> — Separate views for each tool</li>
</ul>

<p>Key components:</p>
<ul>
  <li><code class="language-plaintext highlighter-rouge">Home.vue</code> — Landing page with tool navigation</li>
  <li><code class="language-plaintext highlighter-rouge">PCAPEditor.vue</code> — Editor interface</li>
  <li><code class="language-plaintext highlighter-rouge">PCAPGenerator.vue</code> — Generator form</li>
  <li><code class="language-plaintext highlighter-rouge">PCAPMerger.vue</code> — Merger interface</li>
  <li><code class="language-plaintext highlighter-rouge">HexViewer.vue</code> — Hex/text viewer</li>
</ul>

<h3 id="communication-flow">Communication Flow</h3>

<div class="language-plaintext highlighter-rouge"><div class="highlight"><pre class="highlight"><code>User → Vue.js Frontend → Axios HTTP → Flask Backend → Scapy Processing → Response → Display
</code></pre></div></div>

<hr />

<h2 id="-key-features--implementation">🚀 Key Features &amp; Implementation</h2>

<h3 id="automatic-checksum-recalculation">Automatic Checksum Recalculation</h3>

<p>When modifying packet fields (IPs, ports), checksums must be updated:</p>

<div class="language-python highlighter-rouge"><div class="highlight"><pre class="highlight"><code><span class="c1"># Delete old checksums
</span><span class="k">del</span> <span class="n">packet</span><span class="p">[</span><span class="n">IP</span><span class="p">].</span><span class="n">chksum</span>
<span class="k">del</span> <span class="n">packet</span><span class="p">[</span><span class="n">TCP</span><span class="p">].</span><span class="n">chksum</span>

<span class="c1"># Scapy automatically recalculates on packet serialization
</span></code></pre></div></div>

<h3 id="complete-tcp-flow-generation">Complete TCP Flow Generation</h3>

<p>Generating realistic TCP flows requires proper state handling:</p>

<ol>
  <li><strong>SYN</strong> — Client initiates connection</li>
  <li><strong>SYN-ACK</strong> — Server responds</li>
  <li><strong>ACK</strong> — Client acknowledges</li>
  <li><strong>PSH-ACK</strong> — Data transmission</li>
  <li><strong>FIN-ACK</strong> — Connection termination</li>
</ol>

<p>Each packet has proper sequence and acknowledgment numbers.</p>

<h3 id="multi-format-pcap-support">Multi-Format PCAP Support</h3>

<p>Using Scapy’s <code class="language-plaintext highlighter-rouge">rdpcap()</code> and <code class="language-plaintext highlighter-rouge">wrpcap()</code> functions:</p>
<ul>
  <li>Automatically detects PCAP vs PCAPNG</li>
  <li>Preserves timestamp precision</li>
  <li>Handles both formats seamlessly</li>
</ul>

<h3 id="hex-viewer-encoding-detection">Hex Viewer Encoding Detection</h3>

<p>The hex viewer tries multiple encodings:</p>
<div class="language-python highlighter-rouge"><div class="highlight"><pre class="highlight"><code><span class="n">encodings</span> <span class="o">=</span> <span class="p">[</span><span class="s">'utf-8'</span><span class="p">,</span> <span class="s">'ascii'</span><span class="p">,</span> <span class="s">'latin-1'</span><span class="p">,</span> <span class="s">'utf-16'</span><span class="p">,</span> <span class="s">'utf-32'</span><span class="p">]</span>
<span class="k">for</span> <span class="n">encoding</span> <span class="ow">in</span> <span class="n">encodings</span><span class="p">:</span>
    <span class="k">try</span><span class="p">:</span>
        <span class="n">text</span> <span class="o">=</span> <span class="n">data</span><span class="p">.</span><span class="n">decode</span><span class="p">(</span><span class="n">encoding</span><span class="p">)</span>
        <span class="k">return</span> <span class="n">text</span><span class="p">,</span> <span class="n">encoding</span>
    <span class="k">except</span> <span class="nb">UnicodeDecodeError</span><span class="p">:</span>
        <span class="k">continue</span>
</code></pre></div></div>

<hr />

<h2 id="-performance-considerations">📊 Performance Considerations</h2>

<ul>
  <li><strong>File Size Limits</strong> — Default 100MB, configurable up to 500MB</li>
  <li><strong>Pagination</strong> — Large files displayed in chunks</li>
  <li><strong>Incremental Processing</strong> — Packets processed one at a time</li>
  <li><strong>Client-Side Rendering</strong> — Vue.js handles DOM updates efficiently</li>
</ul>

<hr />

<h2 id="-quick-start">🔧 Quick Start</h2>

<div class="language-bash highlighter-rouge"><div class="highlight"><pre class="highlight"><code><span class="c"># Clone repository</span>
git clone https://github.com/Ajay3007/devtoolbox.git
<span class="nb">cd </span>devtoolbox

<span class="c"># Backend setup (Terminal 1)</span>
python <span class="nt">-m</span> venv .venv
.venv<span class="se">\S</span>cripts<span class="se">\a</span>ctivate  <span class="c"># Windows</span>
pip <span class="nb">install</span> <span class="nt">-r</span> backend/requirements.txt
python backend/app.py

<span class="c"># Frontend setup (Terminal 2)</span>
<span class="nb">cd </span>frontend
npm <span class="nb">install
</span>npm run dev
</code></pre></div></div>

<p>Visit <strong>http://localhost:8080</strong> and start analyzing!</p>

<hr />

<h2 id="-real-world-use-cases">🎓 Real-World Use Cases</h2>

<h3 id="network-forensics">Network Forensics</h3>
<p>Analyze suspicious traffic captures from IDS/IPS systems, modify timestamps for timeline analysis, and extract specific protocols for detailed inspection.</p>

<h3 id="protocol-testing">Protocol Testing</h3>
<p>Generate synthetic traffic to test protocol implementations, verify state machine handling, and stress-test network equipment.</p>

<h3 id="security-research">Security Research</h3>
<p>Modify packet fields to test security controls, create proof-of-concept exploits in controlled environments, and analyze malware network behavior.</p>

<h3 id="education">Education</h3>
<p>Learn about network protocols by inspecting real packet captures, understand TCP 3-way handshake with visual flows, and practice protocol analysis.</p>

<hr />

<h2 id="-future-enhancements">🔮 Future Enhancements</h2>

<ul>
  <li><strong>Packet Filtering</strong> — Filter by protocol, IP, port, or custom expressions</li>
  <li><strong>Statistics Dashboard</strong> — Visual graphs for protocol distribution, bandwidth usage</li>
  <li><strong>Batch Operations</strong> — Modify multiple packets simultaneously</li>
  <li><strong>Protocol Dissectors</strong> — Deep inspection for more application protocols</li>
  <li><strong>Live Capture</strong> — Real-time packet capture from network interfaces</li>
  <li><strong>Export Formats</strong> — Support for CSV, JSON exports of packet data</li>
</ul>

<hr />

<h2 id="-lessons-learned">📝 Lessons Learned</h2>

<h3 id="1-scapy-is-powerful-but-complex">1. Scapy is Powerful but Complex</h3>
<p>Scapy’s flexibility comes with a learning curve. Understanding packet layers and field manipulation required extensive documentation reading.</p>

<h3 id="2-checksum-handling">2. Checksum Handling</h3>
<p>Automatic checksum recalculation works well, but edge cases (like tunneled packets) need special handling.</p>

<h3 id="3-file-upload-security">3. File Upload Security</h3>
<p>Always validate file types, limit file sizes, and sanitize filenames to prevent security issues.</p>

<h3 id="4-frontend-backend-separation">4. Frontend-Backend Separation</h3>
<p>Using Vue.js + Flask allows independent development and easier testing of both layers.</p>

<hr />

<h2 id="-conclusion">🎯 Conclusion</h2>

<p><strong>DevToolBox</strong> started as a personal need and evolved into a comprehensive toolkit for network analysis. By combining multiple utilities in a single web interface, it simplifies workflows for network engineers, security researchers, and developers.</p>

<p>The project demonstrates:</p>
<ul>
  <li>Practical application of <strong>data plane</strong> concepts</li>
  <li><strong>System design</strong> for web-based tools</li>
  <li>Integration of Python packet processing with modern JavaScript frameworks</li>
</ul>

<p>Whether you’re debugging network issues, generating test data, or learning about protocols, DevToolBox provides an accessible, powerful solution.</p>

<p><strong>Try it out:</strong> <a href="https://github.com/Ajay3007/devtoolbox" target="_blank" rel="noopener noreferrer">GitHub - Ajay3007/devtoolbox</a></p>

<hr />

<h2 id="-related-topics">🔗 Related Topics</h2>

<ul>
  <li><a href="/learning/data-plane/">Data Plane Technologies</a></li>
  <li><a href="/learning/networking/">Networking Fundamentals</a></li>
  <li><a href="/learning/system-design/">System Design Concepts</a></li>
</ul>

<hr />

<p><em>Built with 💻 by Ajay — Exploring the intersection of networking, data plane, and software engineering.</em></p>

<hr />

<div style="text-align: center; margin-top: 3rem; padding-top: 2rem; border-top: 1px solid #e2e8f0;">
  <a href="/blogs" style="display:inline-block;padding:10px 20px;background:#667eea;color:white;border-radius:5px;text-decoration:none;margin-right:10px;">← All Blogs</a>
  <a href="/" style="display:inline-block;padding:10px 20px;background:#764ba2;color:white;border-radius:5px;text-decoration:none;">Home 🏠</a>
</div>]]></content><author><name>Ajay Kumar Gupt</name></author><category term="data-plane" /><category term="system-design" /><category term="general" /><summary type="html"><![CDATA[Building a hybrid web application for PCAP editing, generation, merging, and hex viewing using Flask and Vue.js. A developer's toolkit for network forensics and packet manipulation.]]></summary></entry><entry><title type="html">Two Pointer Technique Explained</title><link href="https://ajay3007.github.io/blog/2025/01/05/two-pointer-technique/" rel="alternate" type="text/html" title="Two Pointer Technique Explained" /><published>2025-01-05T00:00:00+00:00</published><updated>2025-01-05T00:00:00+00:00</updated><id>https://ajay3007.github.io/blog/2025/01/05/two-pointer-technique</id><content type="html" xml:base="https://ajay3007.github.io/blog/2025/01/05/two-pointer-technique/"><![CDATA[<h2 id="what-is-the-two-pointer-technique">What is the Two Pointer Technique?</h2>

<p>The <strong>Two Pointer Technique</strong> is a common algorithmic approach where we use <strong>two indices (pointers)</strong> to traverse a data structure like an array or string.</p>

<p>It is widely used in:</p>
<ul>
  <li><strong>DSA</strong></li>
  <li><strong>Algorithms</strong></li>
  <li><strong>Competitive Programming</strong></li>
</ul>

<hr />

<h2 id="why-use-two-pointers">Why use Two Pointers?</h2>

<ul>
  <li>Reduces time complexity</li>
  <li>Avoids unnecessary nested loops</li>
  <li>Makes solutions cleaner and faster</li>
</ul>

<hr />

<h2 id="example-problem">Example Problem</h2>

<p><strong>Problem:</strong><br />
Check if there exists a pair in a sorted array whose sum is equal to <code class="language-plaintext highlighter-rouge">X</code>.</p>

<h3 id="approach">Approach</h3>
<ul>
  <li>One pointer at the start</li>
  <li>One pointer at the end</li>
  <li>Move pointers based on the current sum</li>
</ul>

<hr />

<h2 id="sample-code-c">Sample Code (C++)</h2>

<div class="language-cpp highlighter-rouge"><div class="highlight"><pre class="highlight"><code><span class="cp">#include</span> <span class="cpf">&lt;bits/stdc++.h&gt;</span><span class="cp">
</span><span class="k">using</span> <span class="k">namespace</span> <span class="n">std</span><span class="p">;</span>

<span class="kt">bool</span> <span class="nf">hasPairWithSum</span><span class="p">(</span><span class="n">vector</span><span class="o">&lt;</span><span class="kt">int</span><span class="o">&gt;&amp;</span> <span class="n">arr</span><span class="p">,</span> <span class="kt">int</span> <span class="n">x</span><span class="p">)</span> <span class="p">{</span>
    <span class="kt">int</span> <span class="n">left</span> <span class="o">=</span> <span class="mi">0</span><span class="p">,</span> <span class="n">right</span> <span class="o">=</span> <span class="n">arr</span><span class="p">.</span><span class="n">size</span><span class="p">()</span> <span class="o">-</span> <span class="mi">1</span><span class="p">;</span>

    <span class="k">while</span> <span class="p">(</span><span class="n">left</span> <span class="o">&lt;</span> <span class="n">right</span><span class="p">)</span> <span class="p">{</span>
        <span class="kt">int</span> <span class="n">sum</span> <span class="o">=</span> <span class="n">arr</span><span class="p">[</span><span class="n">left</span><span class="p">]</span> <span class="o">+</span> <span class="n">arr</span><span class="p">[</span><span class="n">right</span><span class="p">];</span>
        <span class="k">if</span> <span class="p">(</span><span class="n">sum</span> <span class="o">==</span> <span class="n">x</span><span class="p">)</span> <span class="k">return</span> <span class="nb">true</span><span class="p">;</span>
        <span class="k">else</span> <span class="k">if</span> <span class="p">(</span><span class="n">sum</span> <span class="o">&lt;</span> <span class="n">x</span><span class="p">)</span> <span class="n">left</span><span class="o">++</span><span class="p">;</span>
        <span class="k">else</span> <span class="n">right</span><span class="o">--</span><span class="p">;</span>
    <span class="p">}</span>
    <span class="k">return</span> <span class="nb">false</span><span class="p">;</span>
<span class="p">}</span>
</code></pre></div></div>

<hr />

<div style="text-align: center; margin-top: 3rem; padding-top: 2rem; border-top: 1px solid #e2e8f0;">
  <a href="/blogs" style="display:inline-block;padding:10px 20px;background:#667eea;color:white;border-radius:5px;text-decoration:none;margin-right:10px;">← All Blogs</a>
  <a href="/" style="display:inline-block;padding:10px 20px;background:#764ba2;color:white;border-radius:5px;text-decoration:none;">Home 🏠</a>
</div>]]></content><author><name>Ajay Kumar Gupt</name></author><category term="dsa" /><category term="algorithms" /><summary type="html"><![CDATA[Learn the Two Pointer Technique, a powerful approach used in DSA and algorithms to solve array and string problems efficiently.]]></summary></entry></feed>